Cyberpunk 2077
Multi-Character Posing Guide
In this guide I will show you how to create multi-character poses for Photomode. I assume you already have experience with making solo poses.If anything is unclear or you have any questions at all about pose making in general you can always shoot me a message on Discord (you will have to send a friend request first) or on any of the pages linked below that allow messaging. I am happy to help. :)
Discord: DeavenExe
What you should know/get before starting
You're going to need everything you would need for a normal photomode pose pack. If you have never made poses before check my Photomode Pose Tutorial before continuing with this tutorial. A lot of the steps overlap luckily so this tutorial will also be quite short!
Last Updated: February 27th 2026
Let's get started
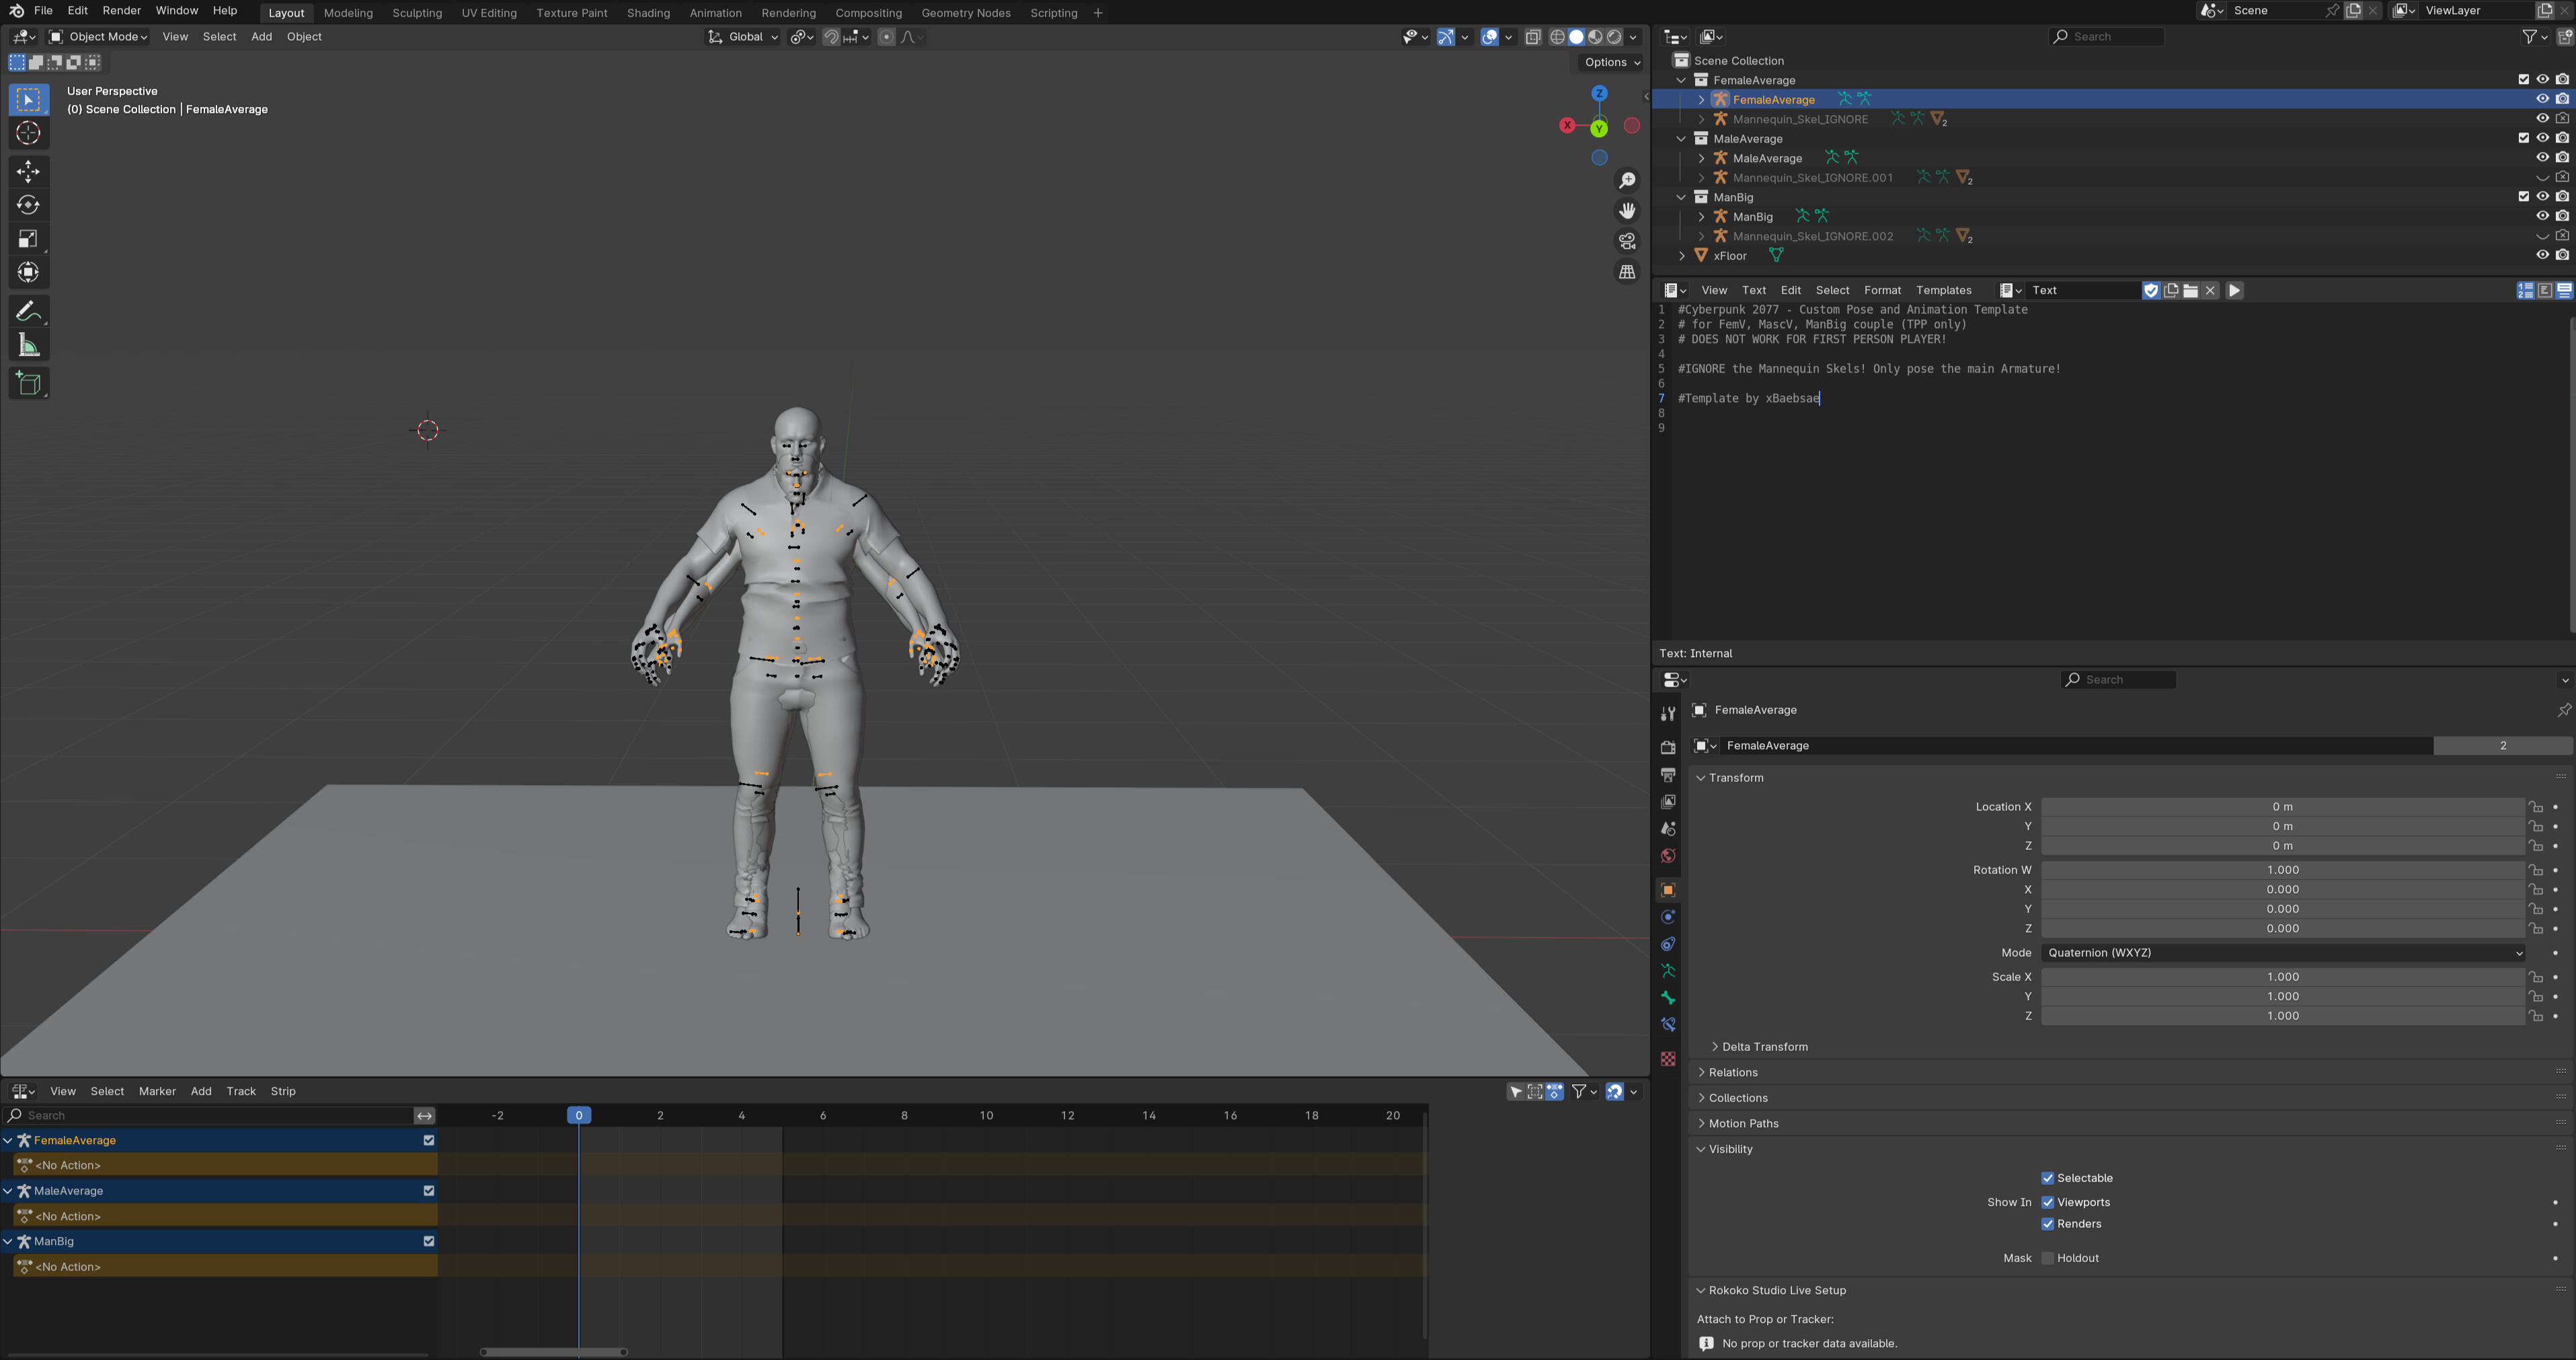
So first thing you need to know is how many models you need and which body types you need per pose. There is technically no limit in Blender but there is a limit in Photomode which is four. However more can be added with AMM.If you are looking at doing multiple pairings for example with couples poses making FF and FM you will need to make separate Wolvenkit projects and see them as variants under one poses pack. You could technically combine it all into one project but it will be a huge mess to navigate so separate is just easier.Now the only place something will be different is Blender when it comes to multi-character poses. Everything else literally stays the same. You name things in Wolvenkit as normal, path properly in the xl file, add the pack name to the localization file and still add the poses to the yaml file as normal. As such I will focus on just the Blender part.For this guide I will be adding a second Fem Model to a Fem Model file. Okay open up Blender with whichever body you are using! I'm using the combined body from xBaebsae Anim Templates since I figure most people new to pose making will have that one.
I won't need Male and Male Big for this so I am going to just delete them from the file.I'm going to select the bodies I don't want in the scene collection and delete them. Usually there will be a bunch of parts left behind so delete those if you have them.
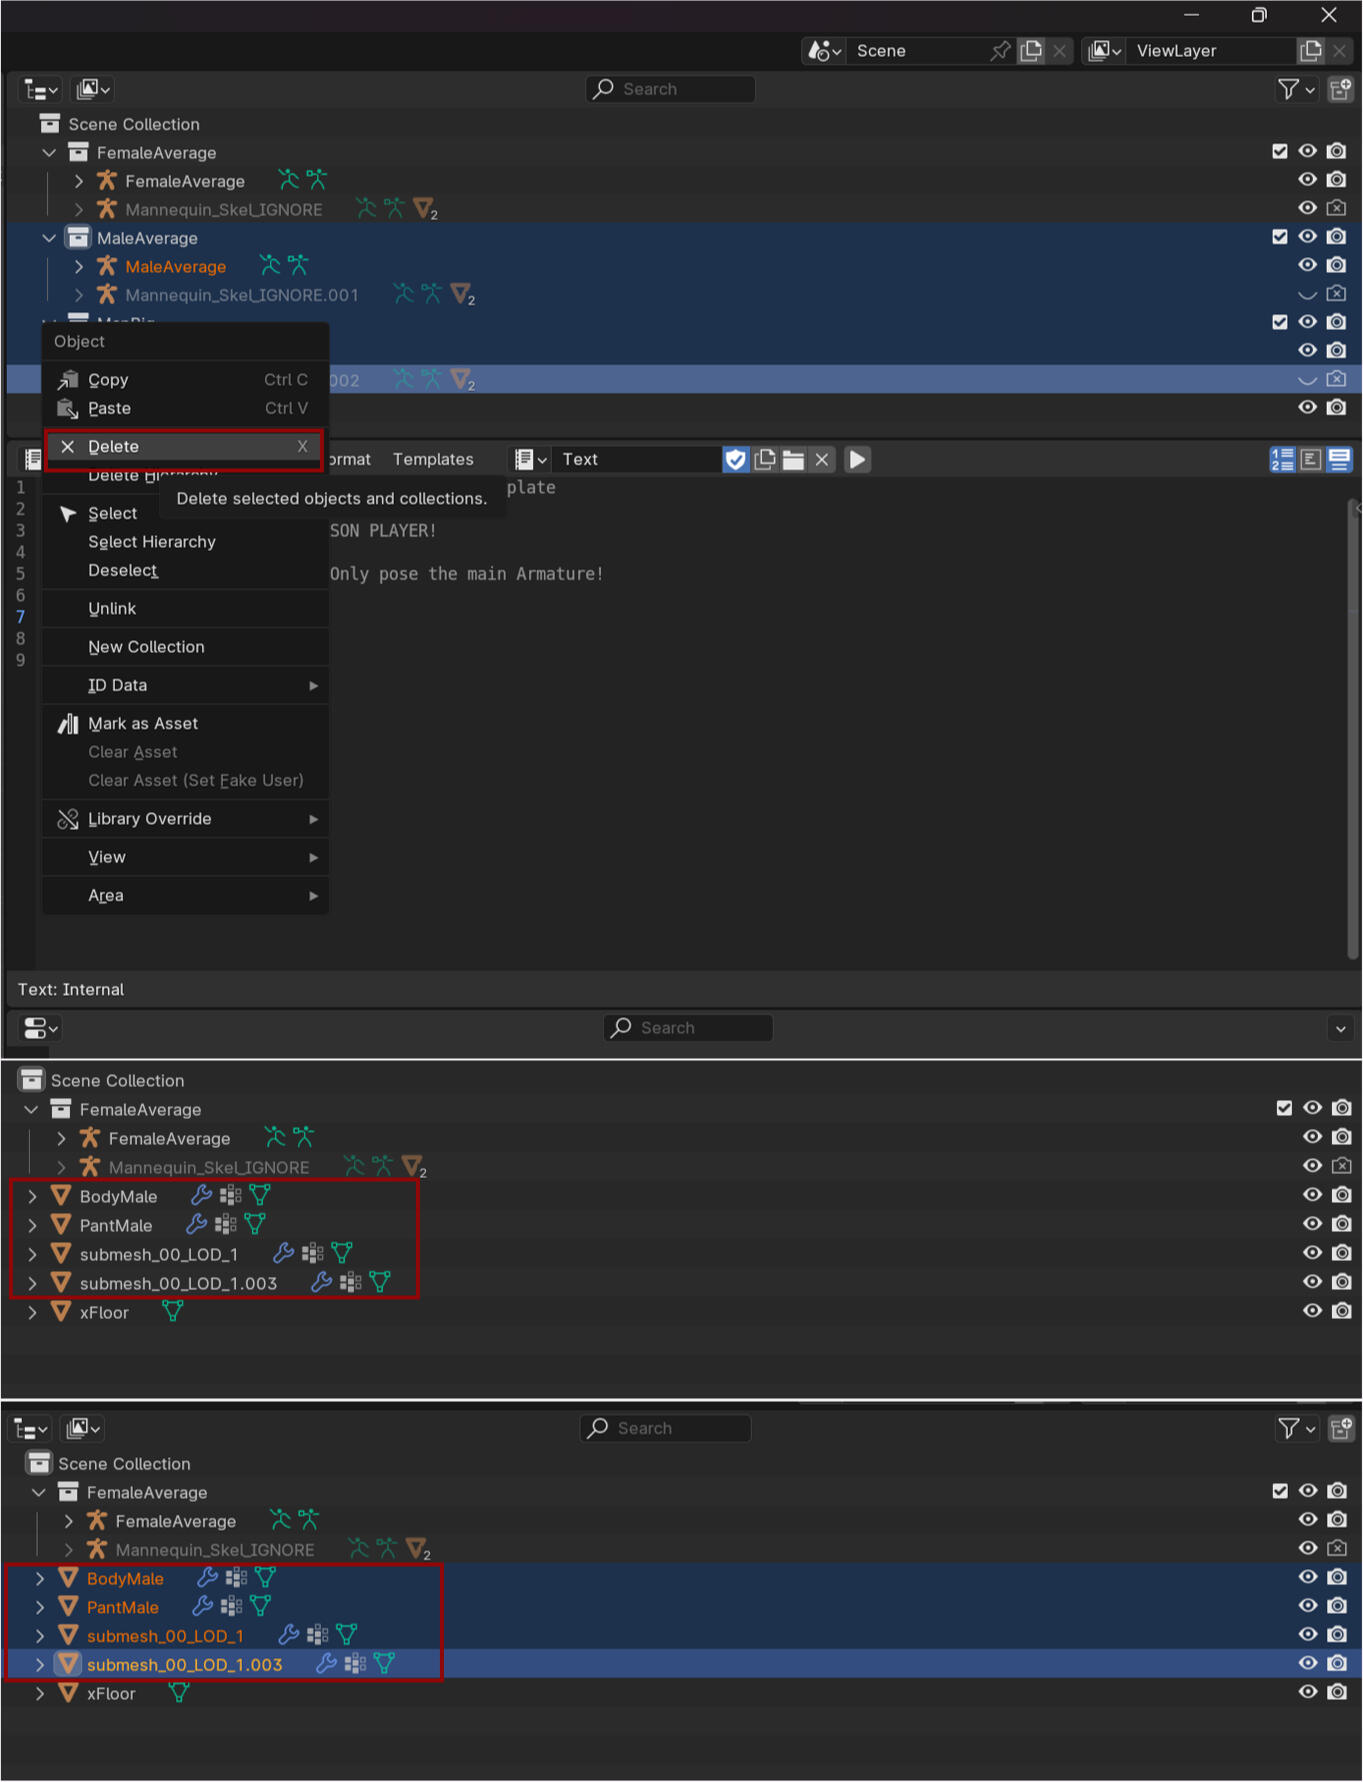
Now you should have just one body in the Viewport.
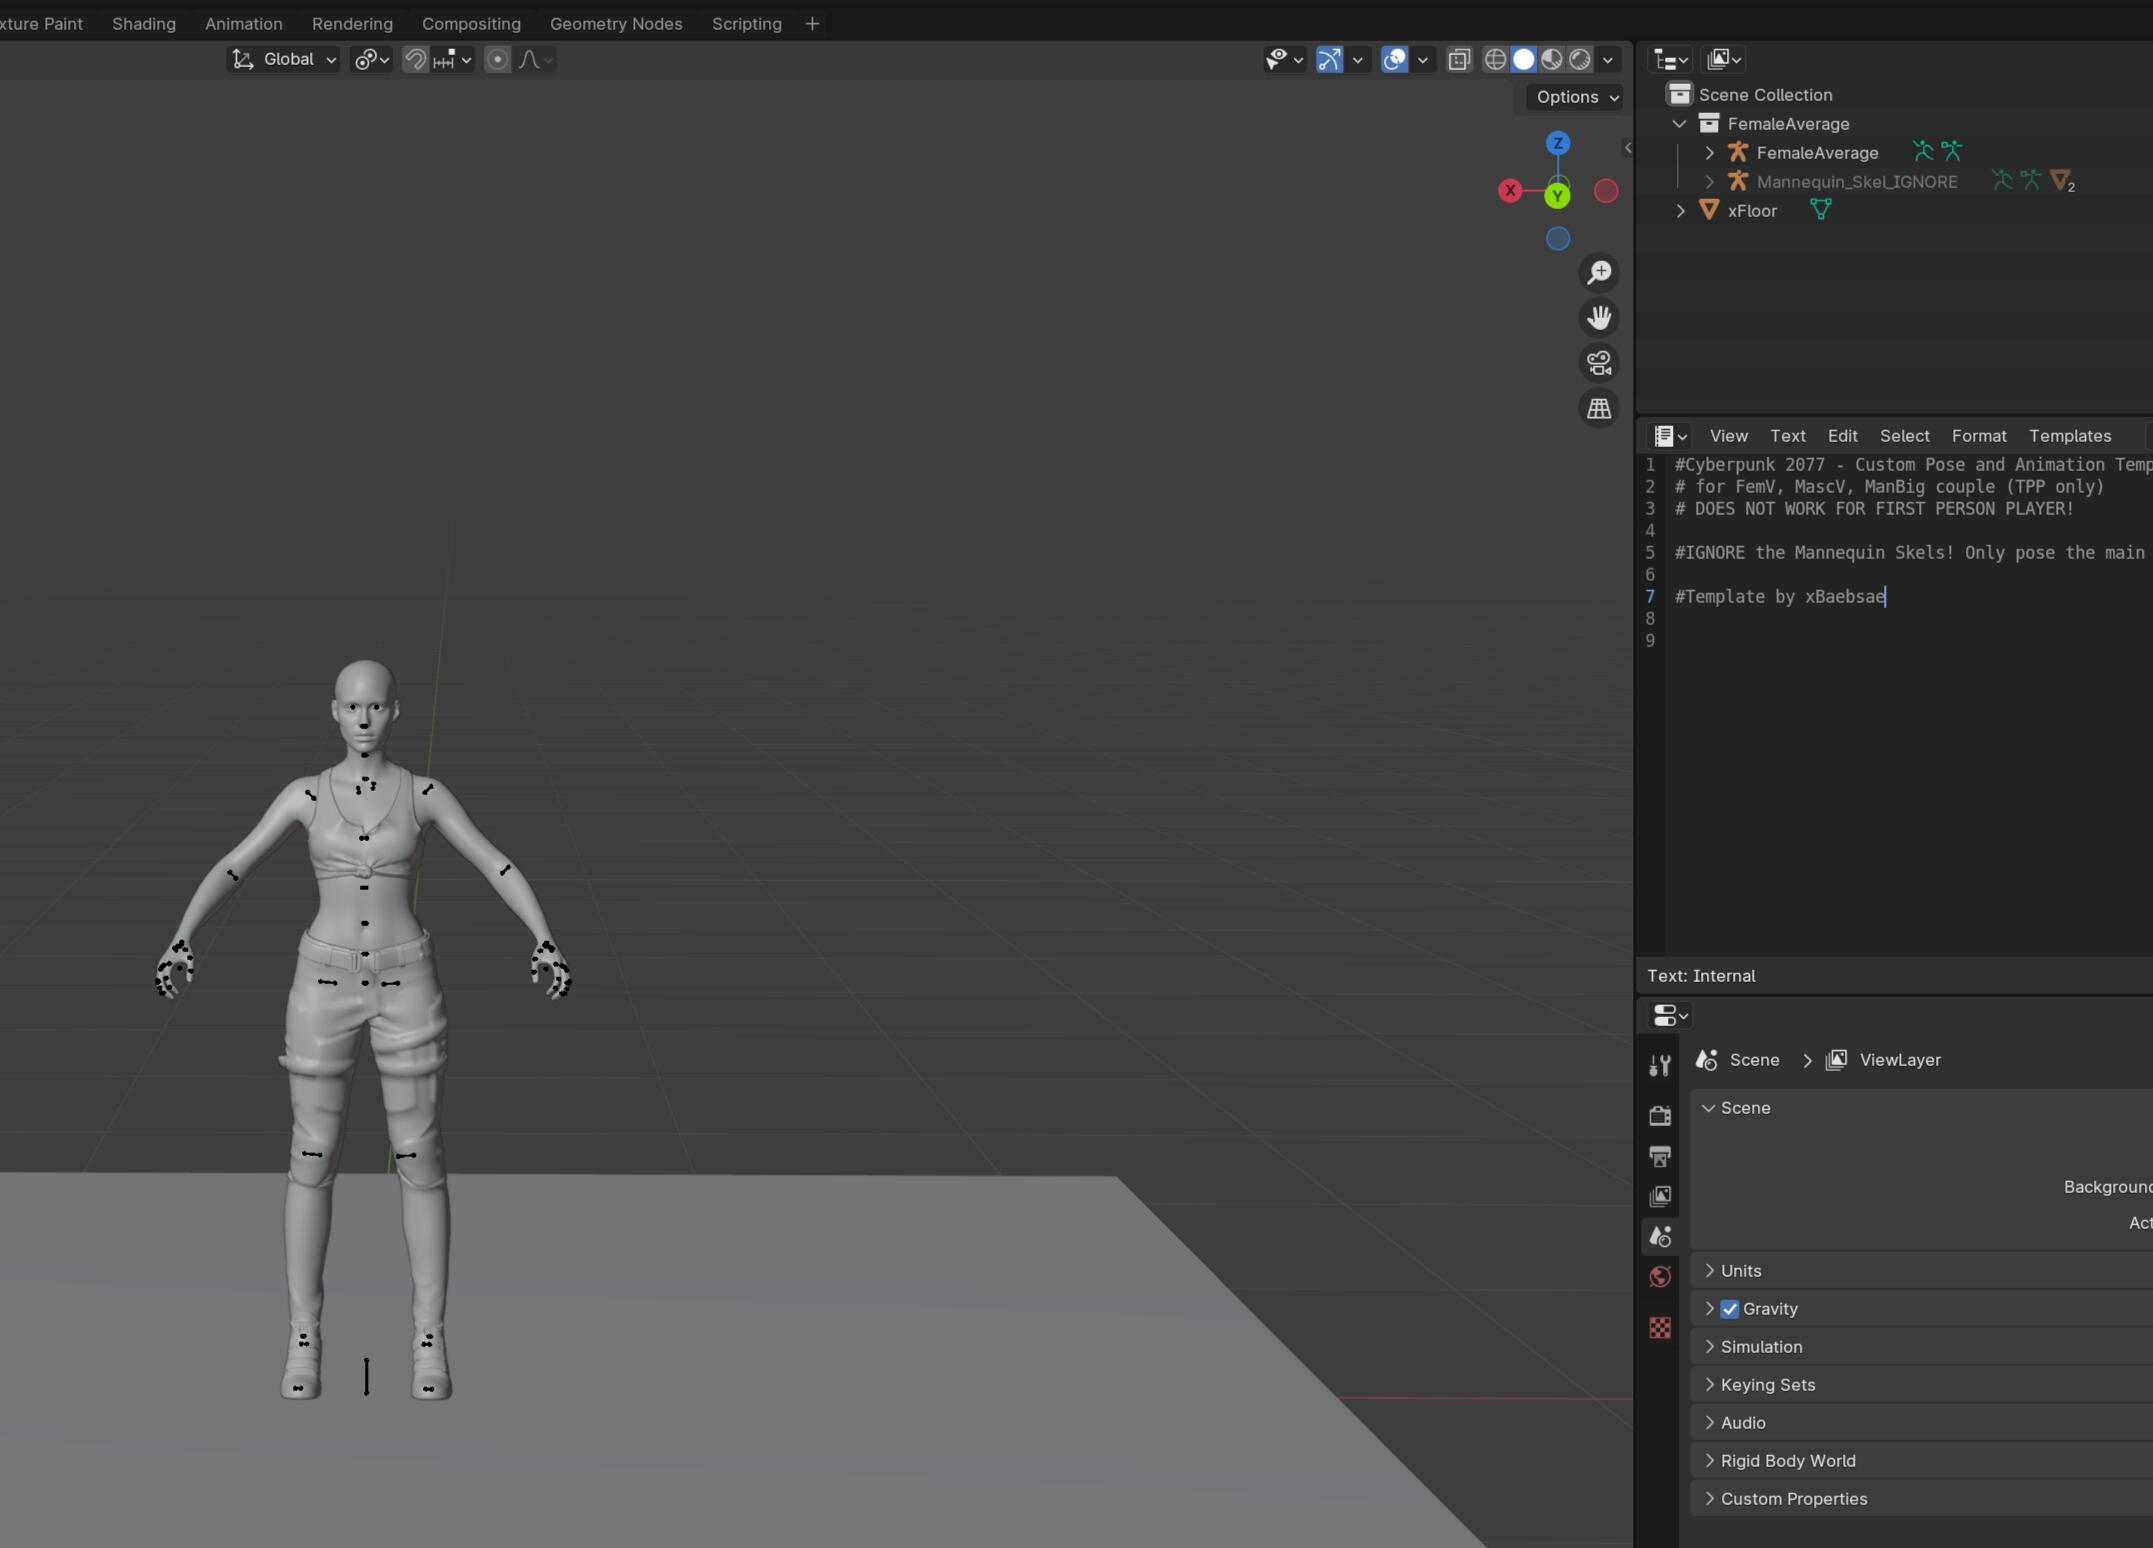
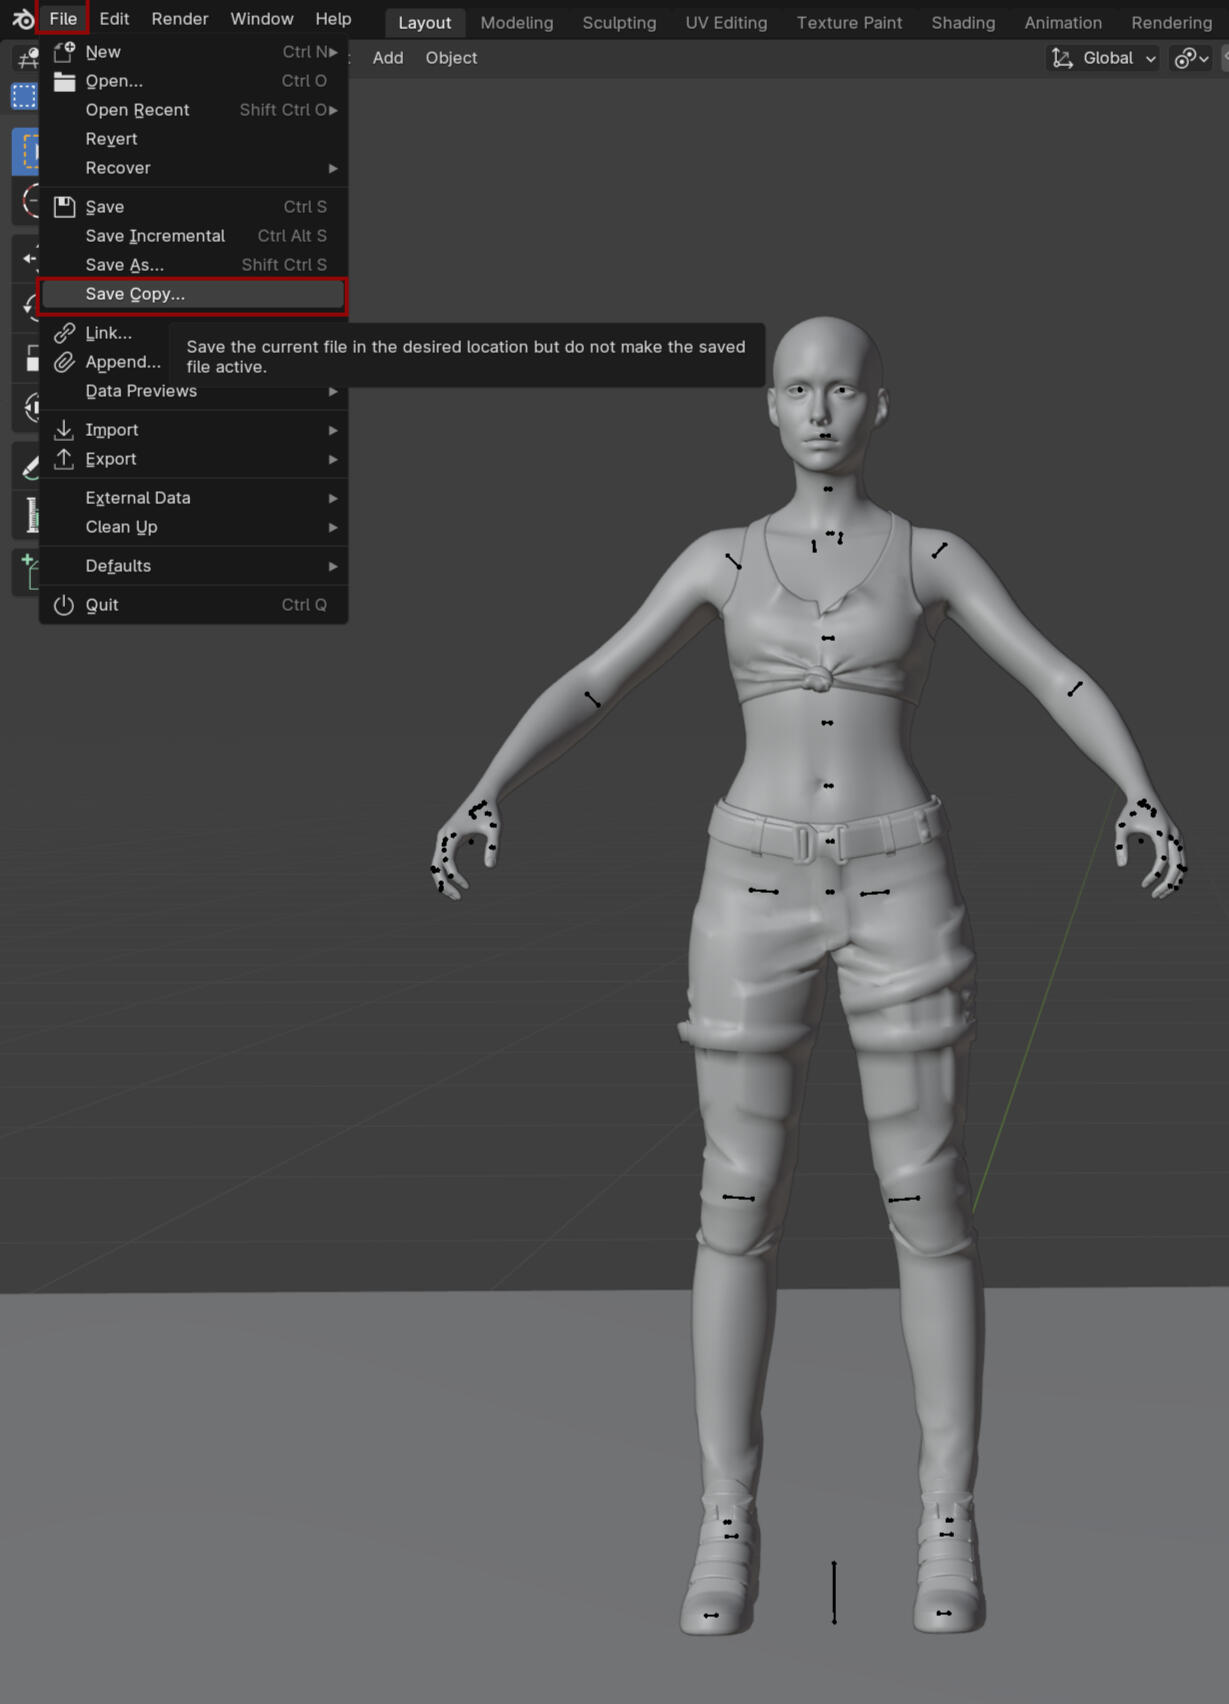
If you are making a multi-character pose with the same body type like I'm doing save this cleaned up file by using the Save Copy option and give it a new name! The reason we do this is because you cannot append a file with the same name and Save As sets it as the active file! Also its nice to just have as a clean version without the other bodies if you don't have it.
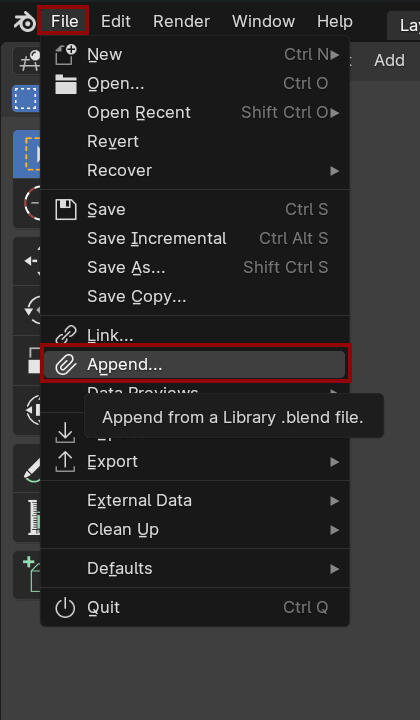
Now that we have a second body saved we're going to go to File - Append
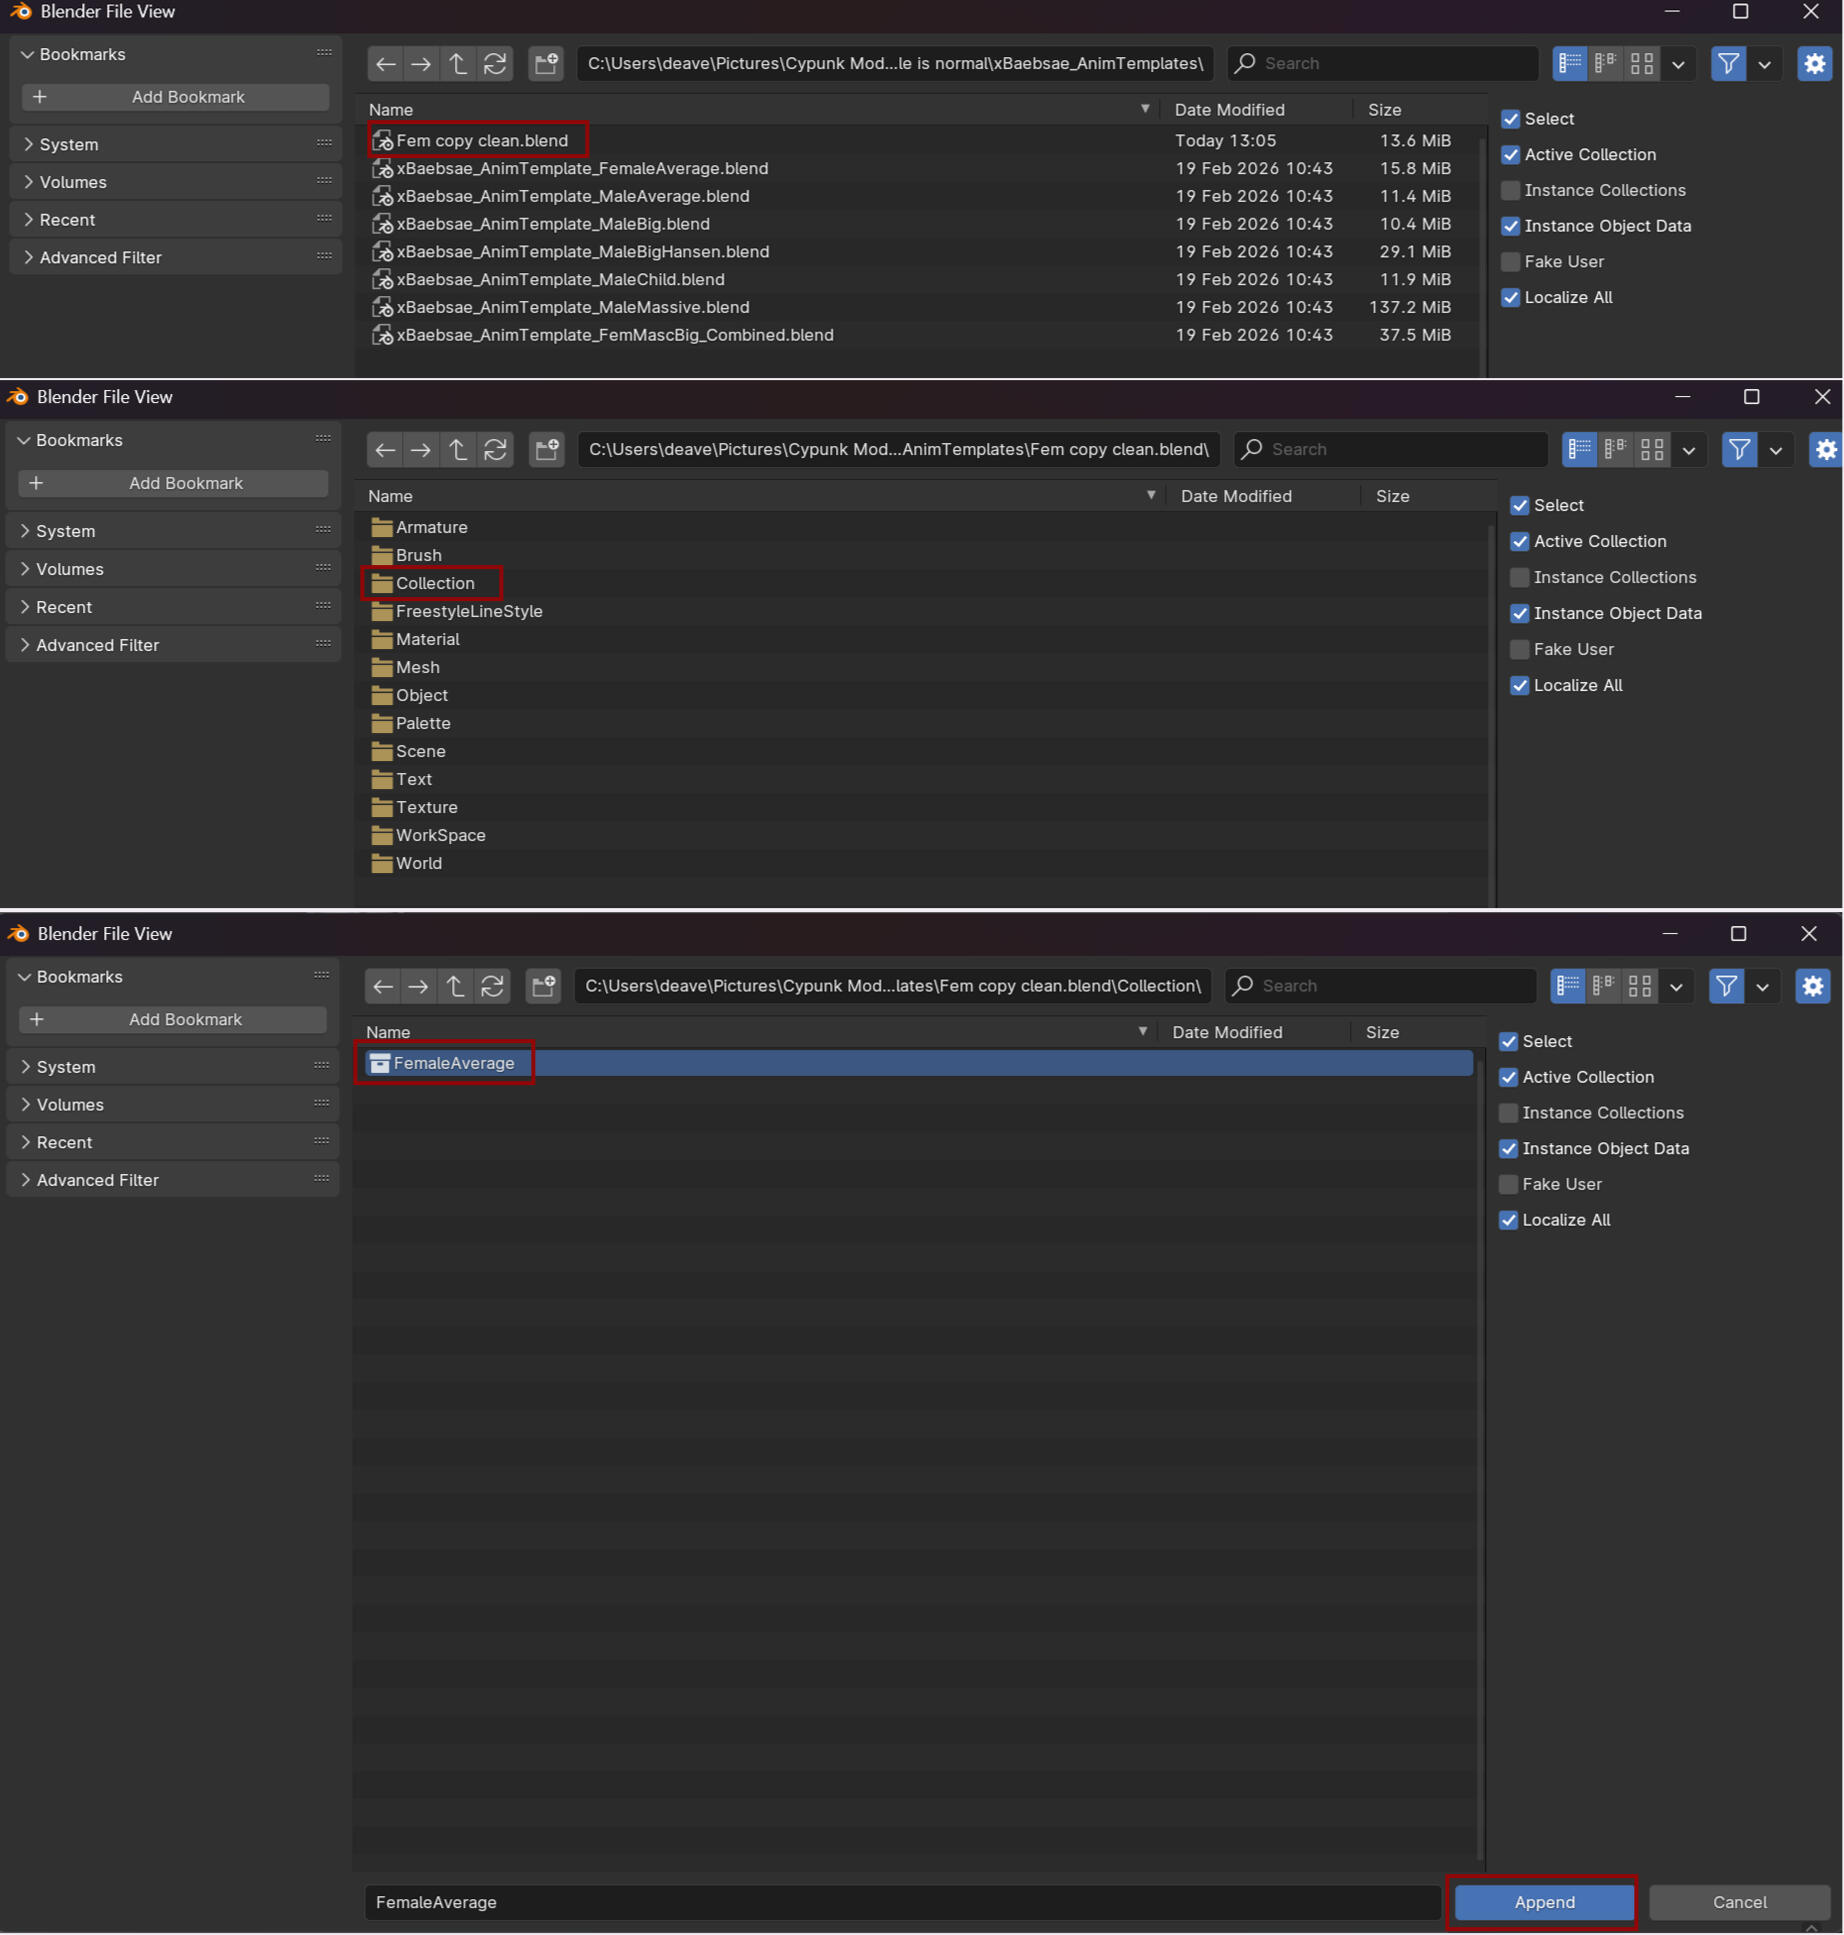
A new window will open. Find the file you just copy saved, in my case I named it Fem Copy Clean. Double click and it will take you to a bunch of folders, we want the Collection folder in this case. In there will be the collection you saved, FemaleAverage for me. Select it and press Append in the bottom.
You will see your model light up orange and there is a new collection in Scene Collection! You have a second model!
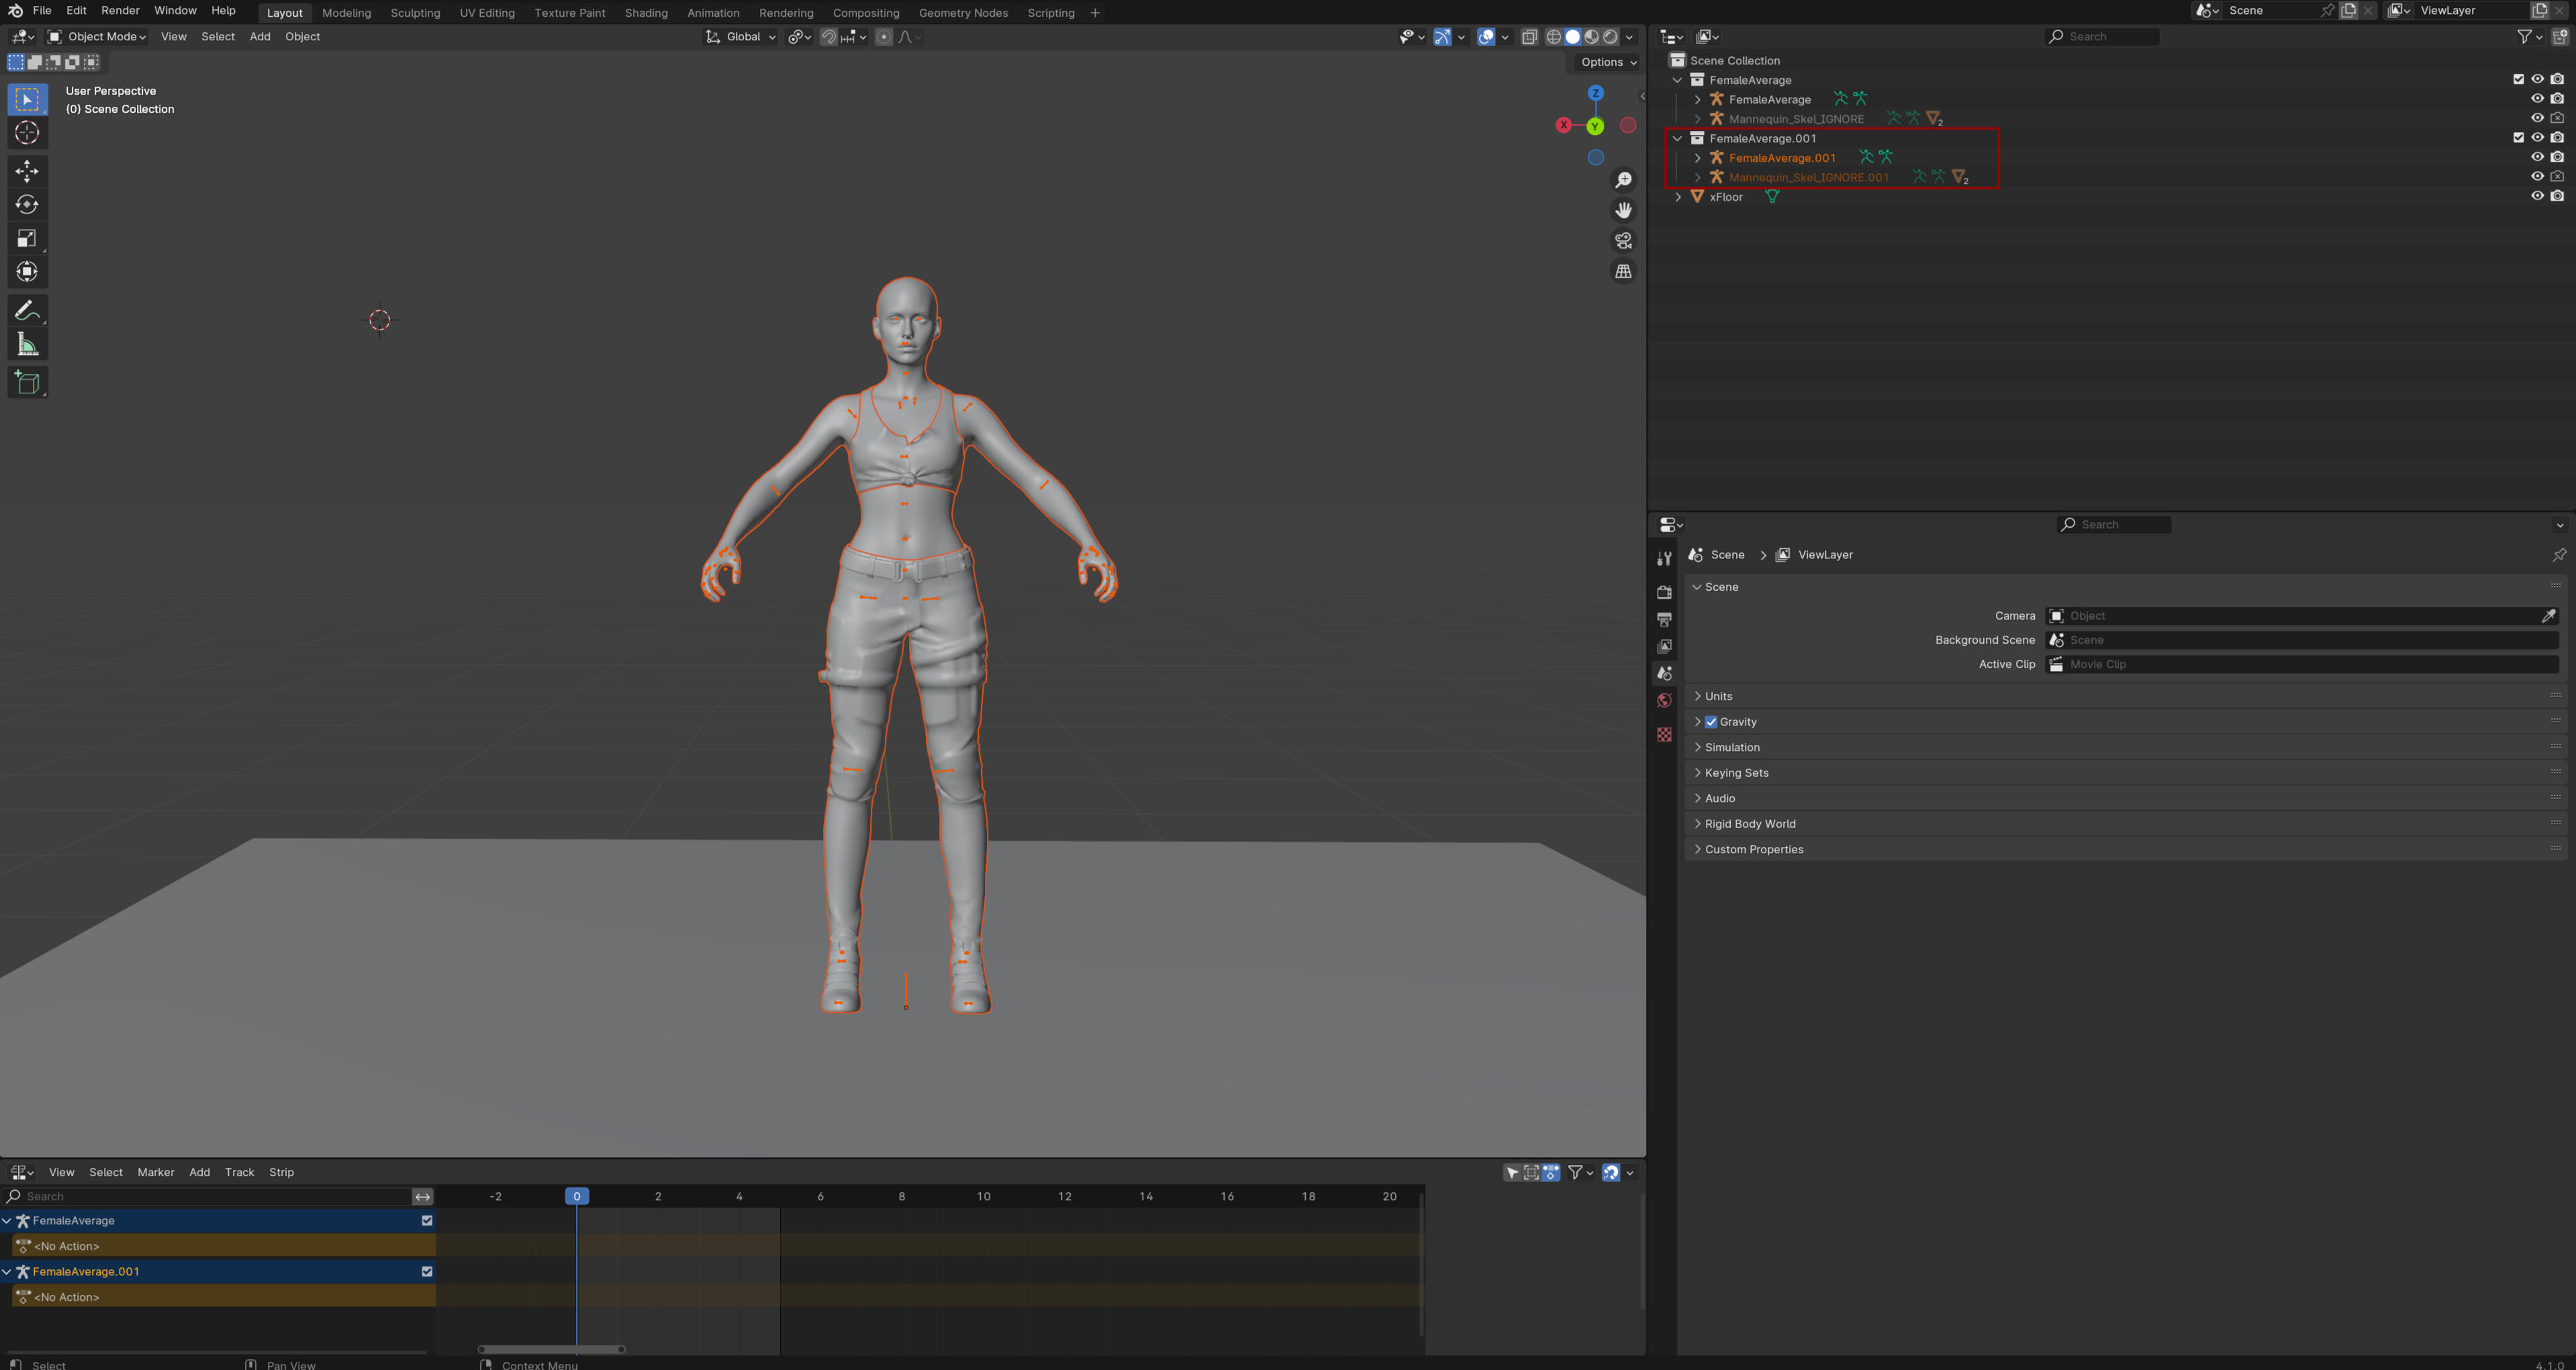
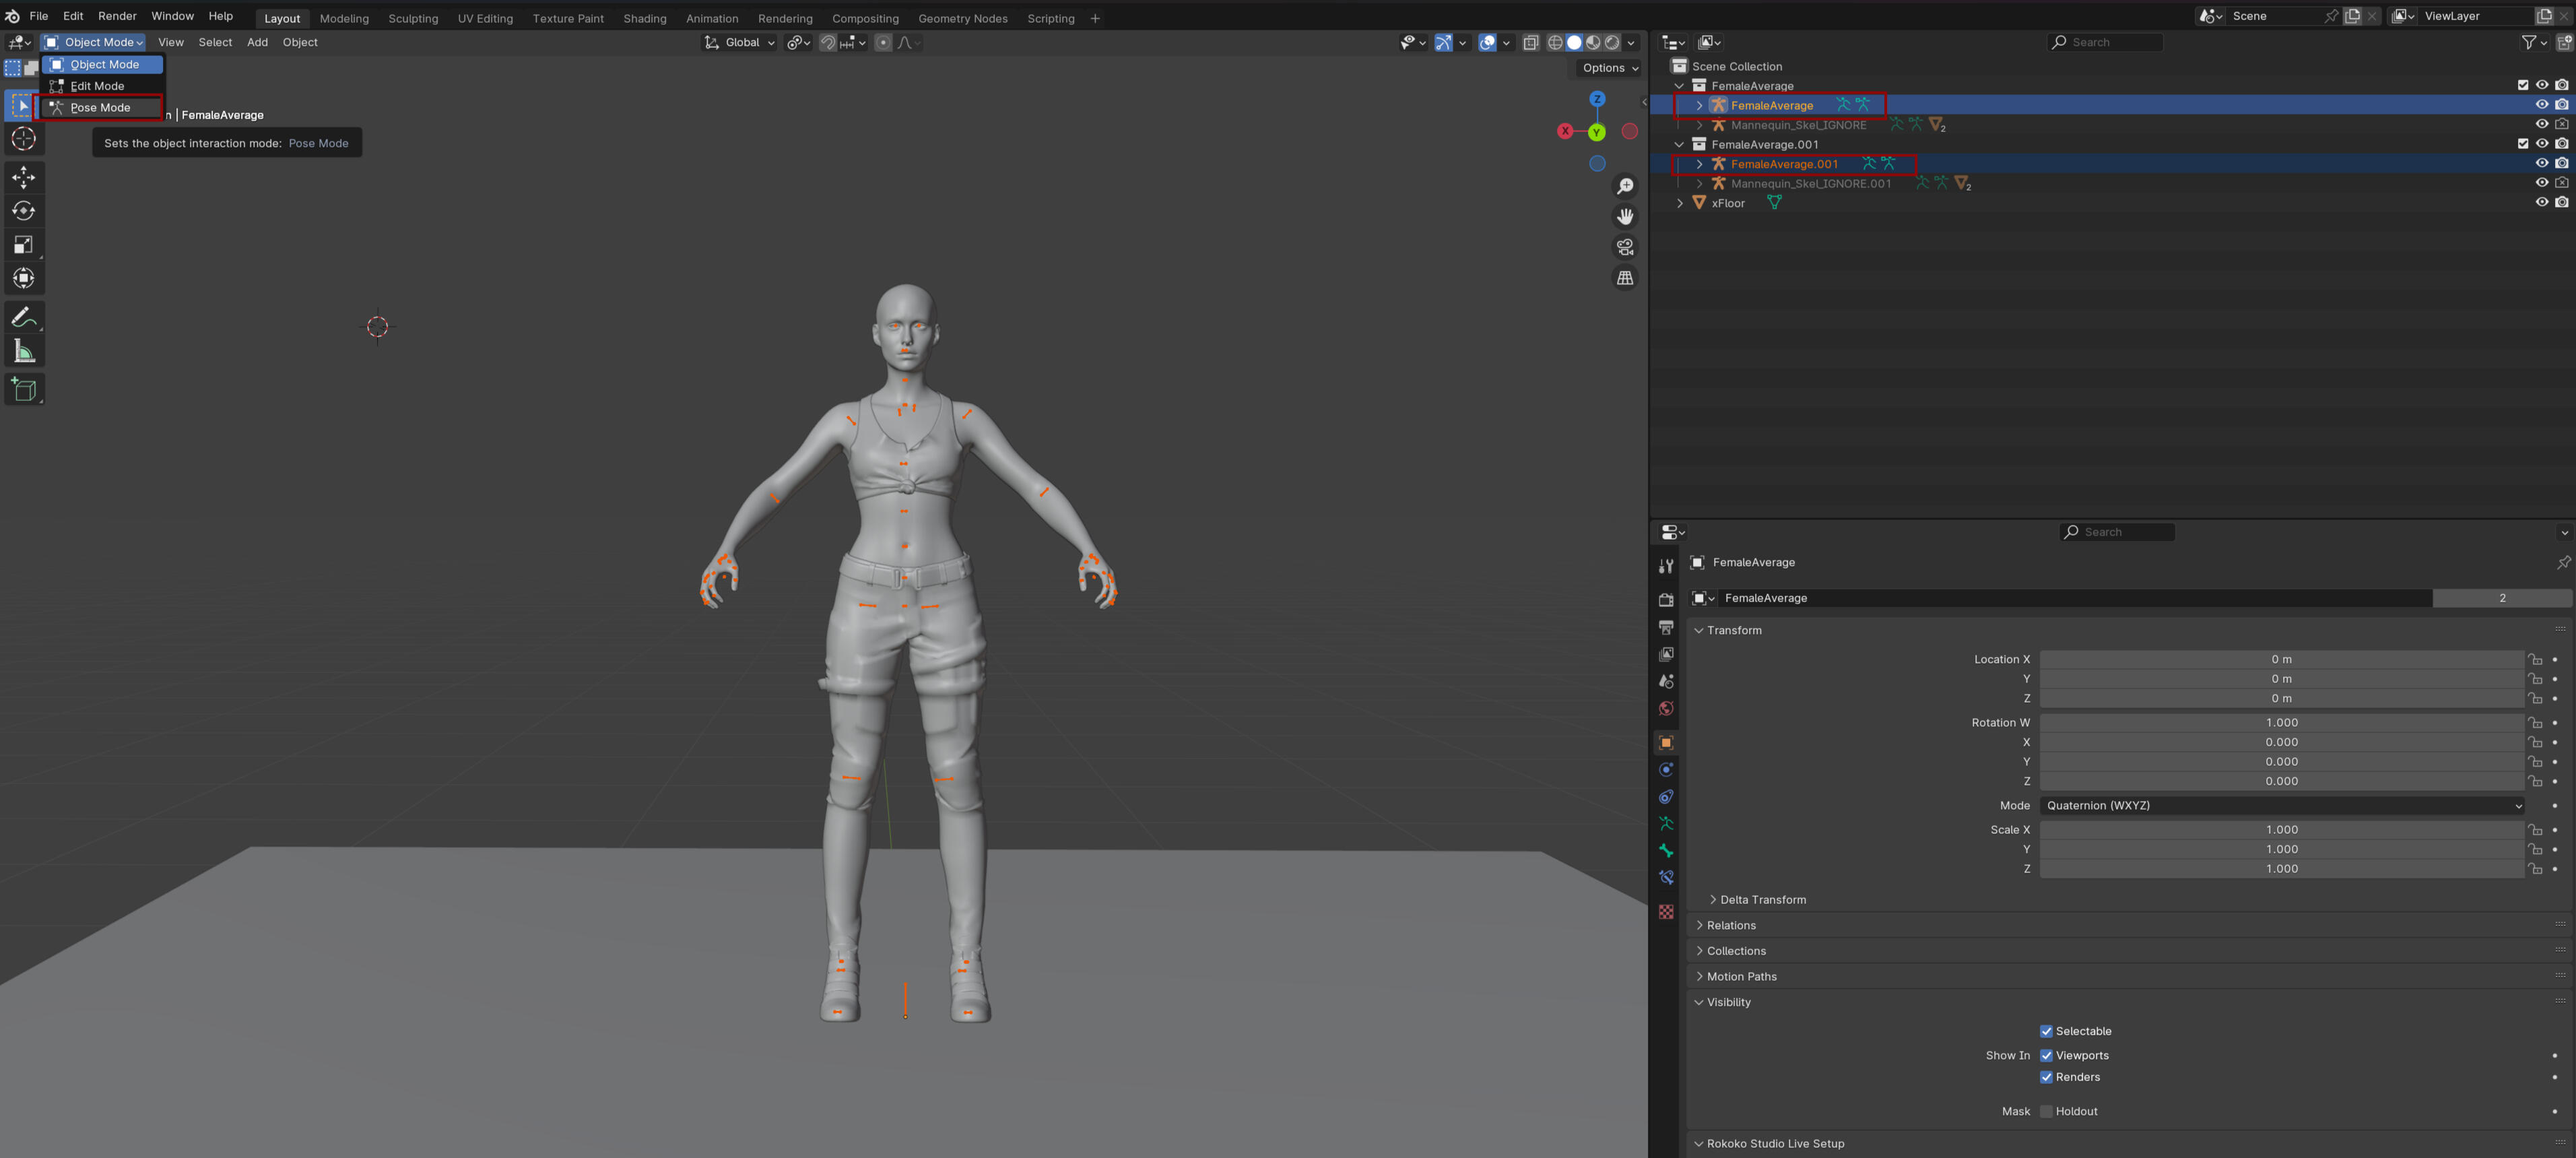
In the Scene Collection select the two armatures and then change to Pose Mode. This will make sure both are in pose mode.
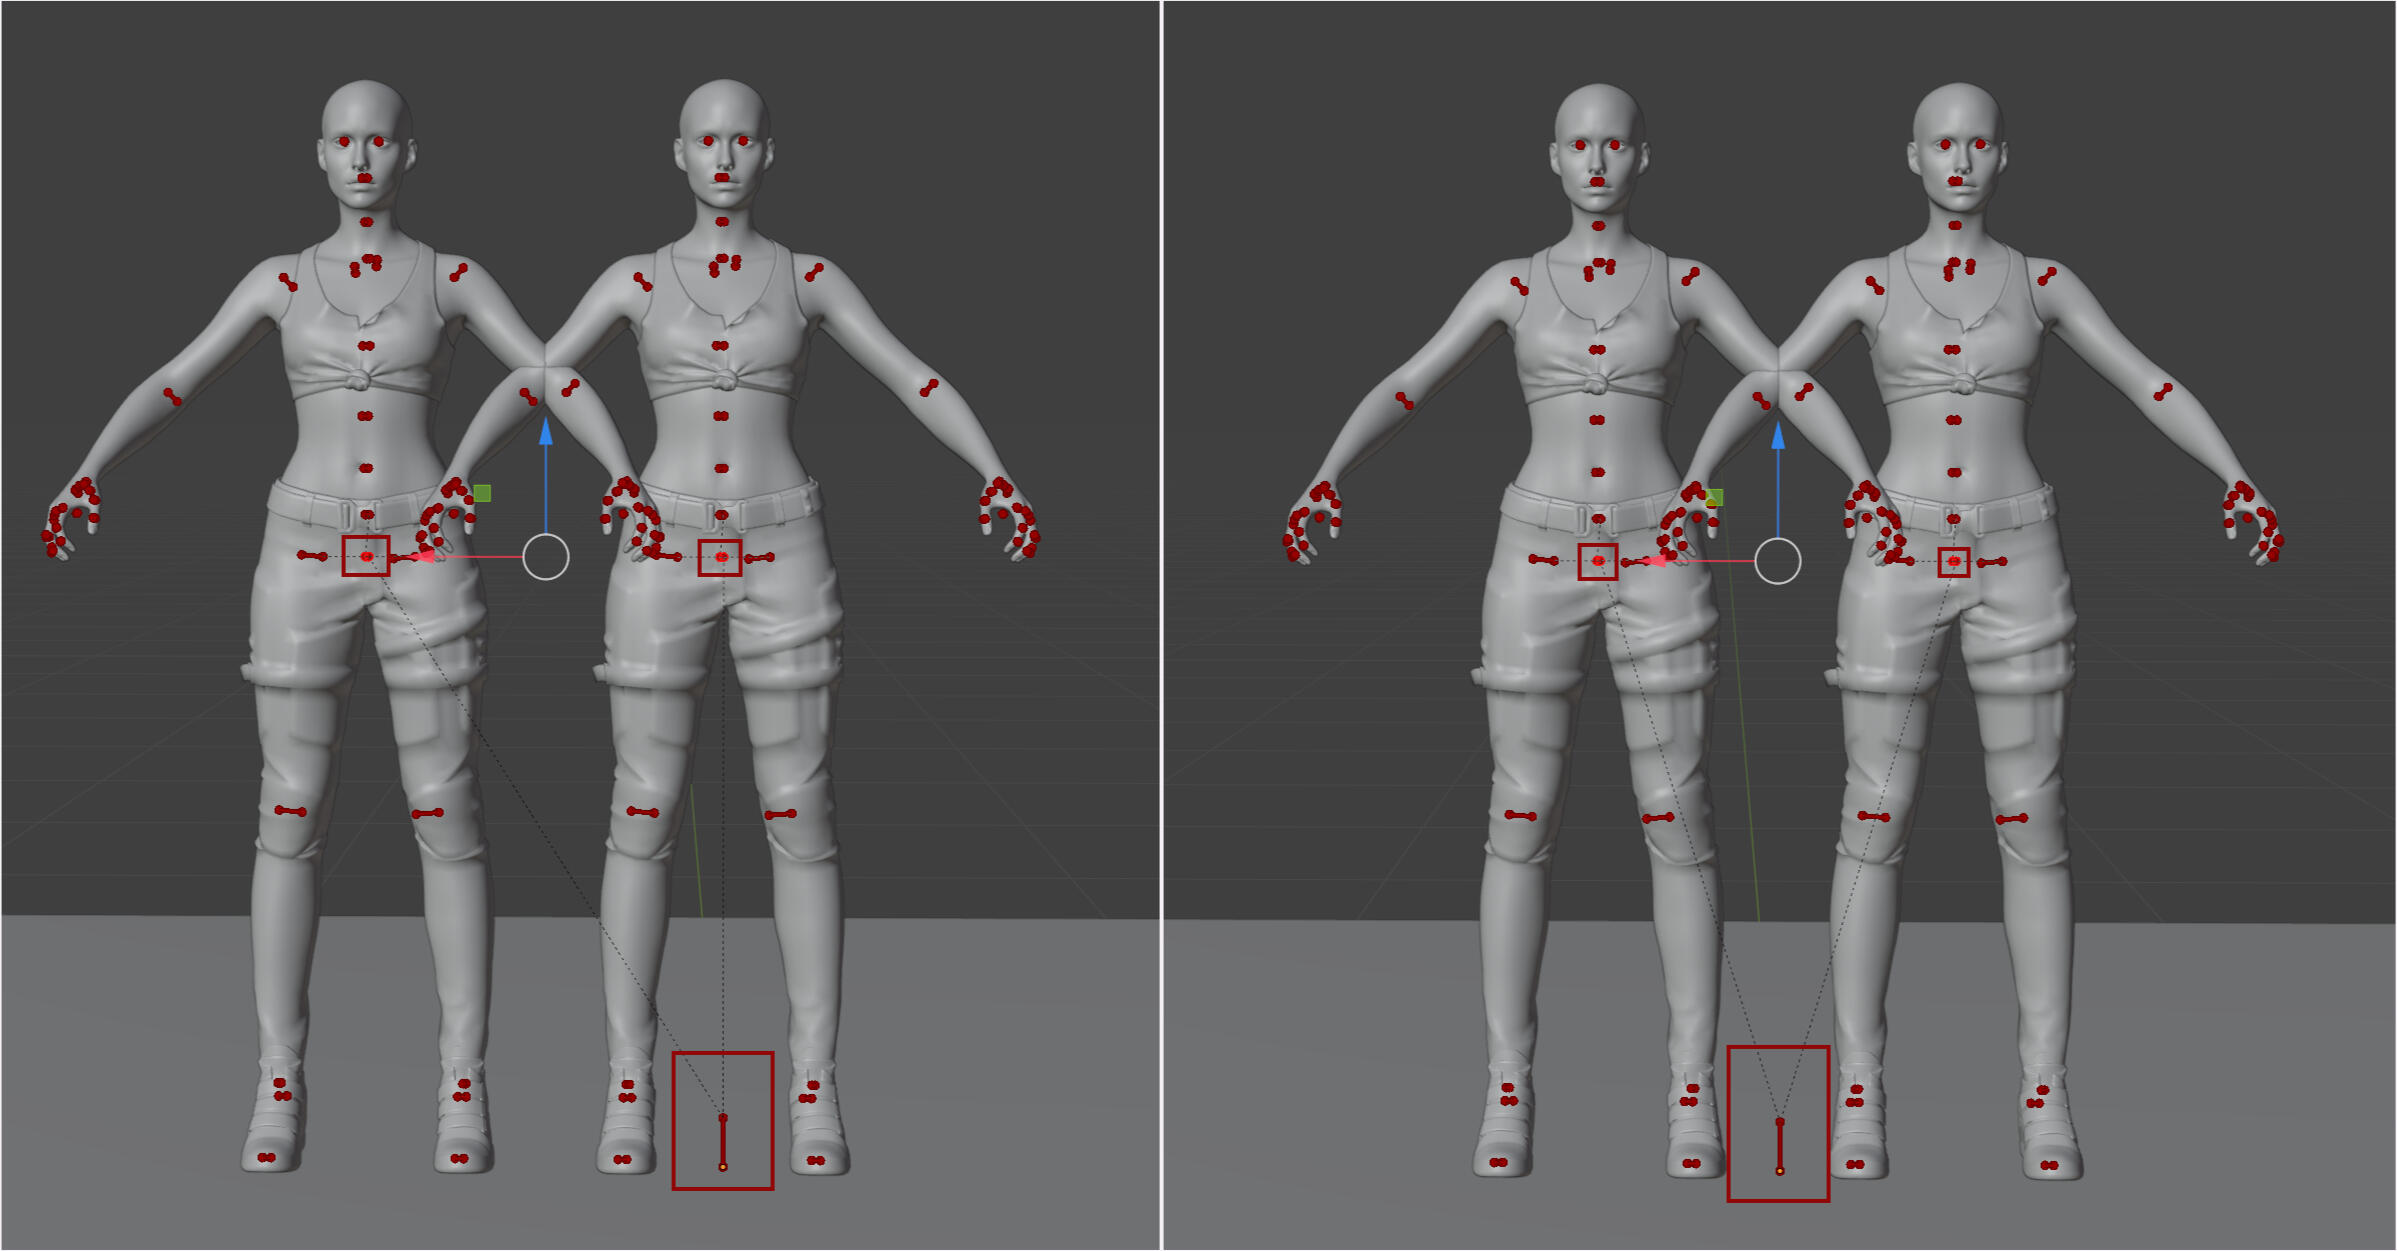
In pose mode select the move tool (arrows) and press the crotch bone. Move the model left or right whichever you prefer. Now you can see both of them clearly!
And that's basically it. You now just make your poses as usual. One thing to note is that when you are done with your pose select all the crotch points and see where the root point/middle ground point is. Scoot your pose so that point is in the middle so the poses show up proper centered in photomode.If you use the copy paste method for adding the animation, or baking in the poses as they officially call it, that I explained in my Photomode Pose Tutorial, where you move the pose to an unposed file, then that is still the same. Do not move your model to the center point in the unposed file, leave it where it is from the position in your multi-character file.Sadly Eye Tracking is still broken in PM so eyes will be hard to adjust with look at camera. The only way to really fix it is to rotate the poses to the front-facing Y. However this may end up breaking the syncing of the models so it's really a choice if you want them to sync together easily in photomode or if you want to be able to use the eyes with the look at camera tool.The other option is making them available for AMM which is not experiencing the eye track issue. Which I would advice offering as an option always to begin with for both multi-character and solo poses.
Hope this tutorial was helpful! If you have any questions or need help with anything you can always shoot me a message! Have fun making multi-character poses!